To start creating a website, to make it a lot easier, downloading VS
Code will help with programming and other things all built into one app.
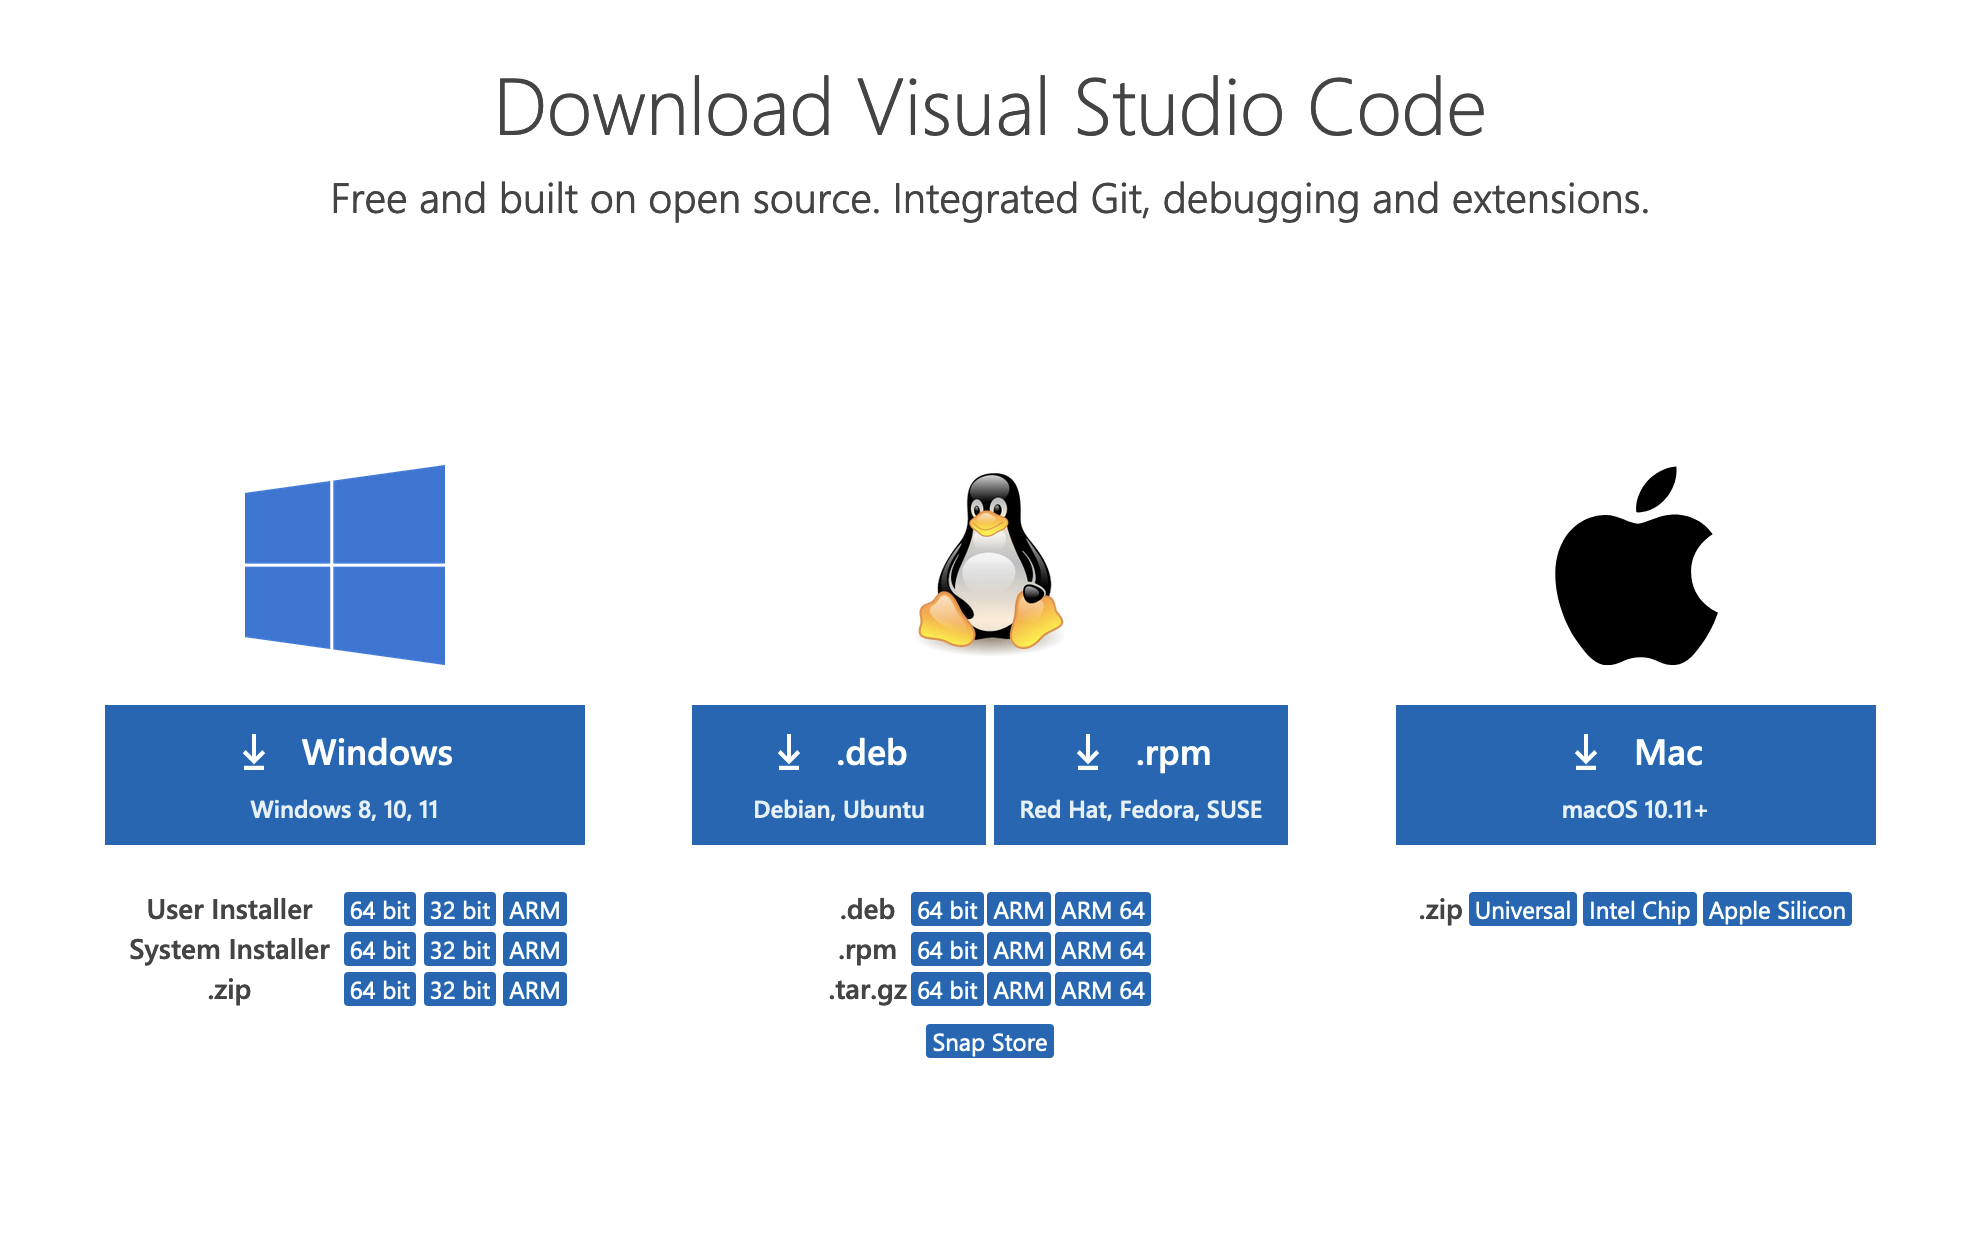
To download Visual Studio Code, visit
this
link and download the app for your operating system.
Install VS Code using the installer and you should be good to go.
code.visualstudio.com/download
Step 2: Prepare VS Code
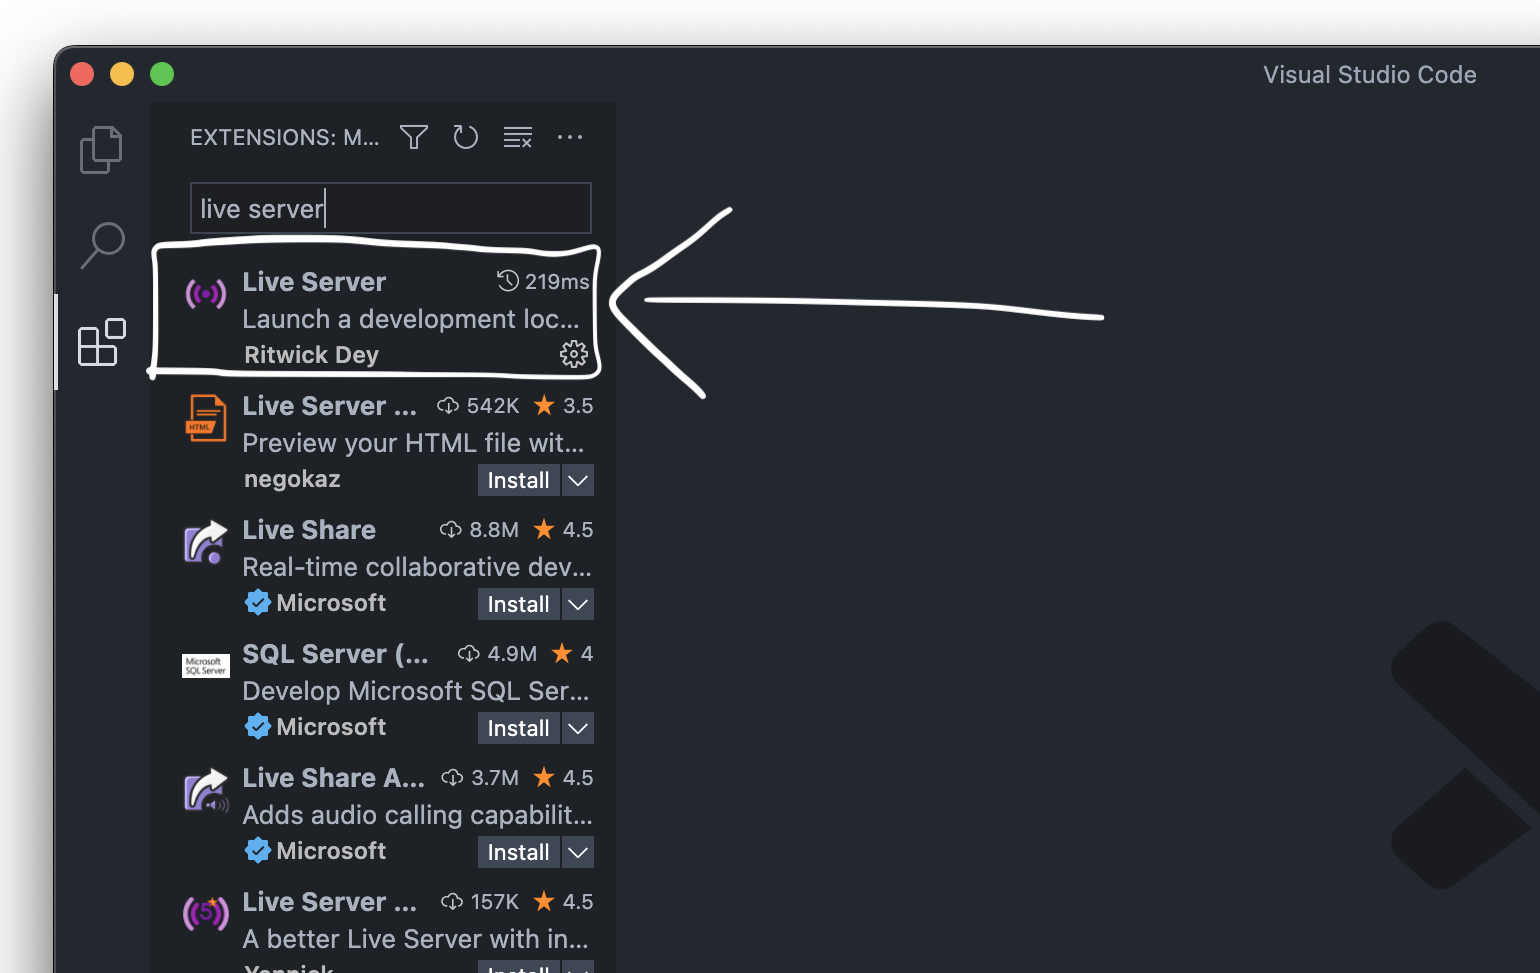
After downloading VS Code, open it up and go to the extensions tab on the left. Search up an extension called
"Live Server", this extension is a tool that will allow you to press a button and then host your website locally
on your computer.
Downloading Live Server
Live Server is a great extension for being able to see how your website will look on the internet while you're
programming since it updates your website look in real time.
Step 3: Create the File
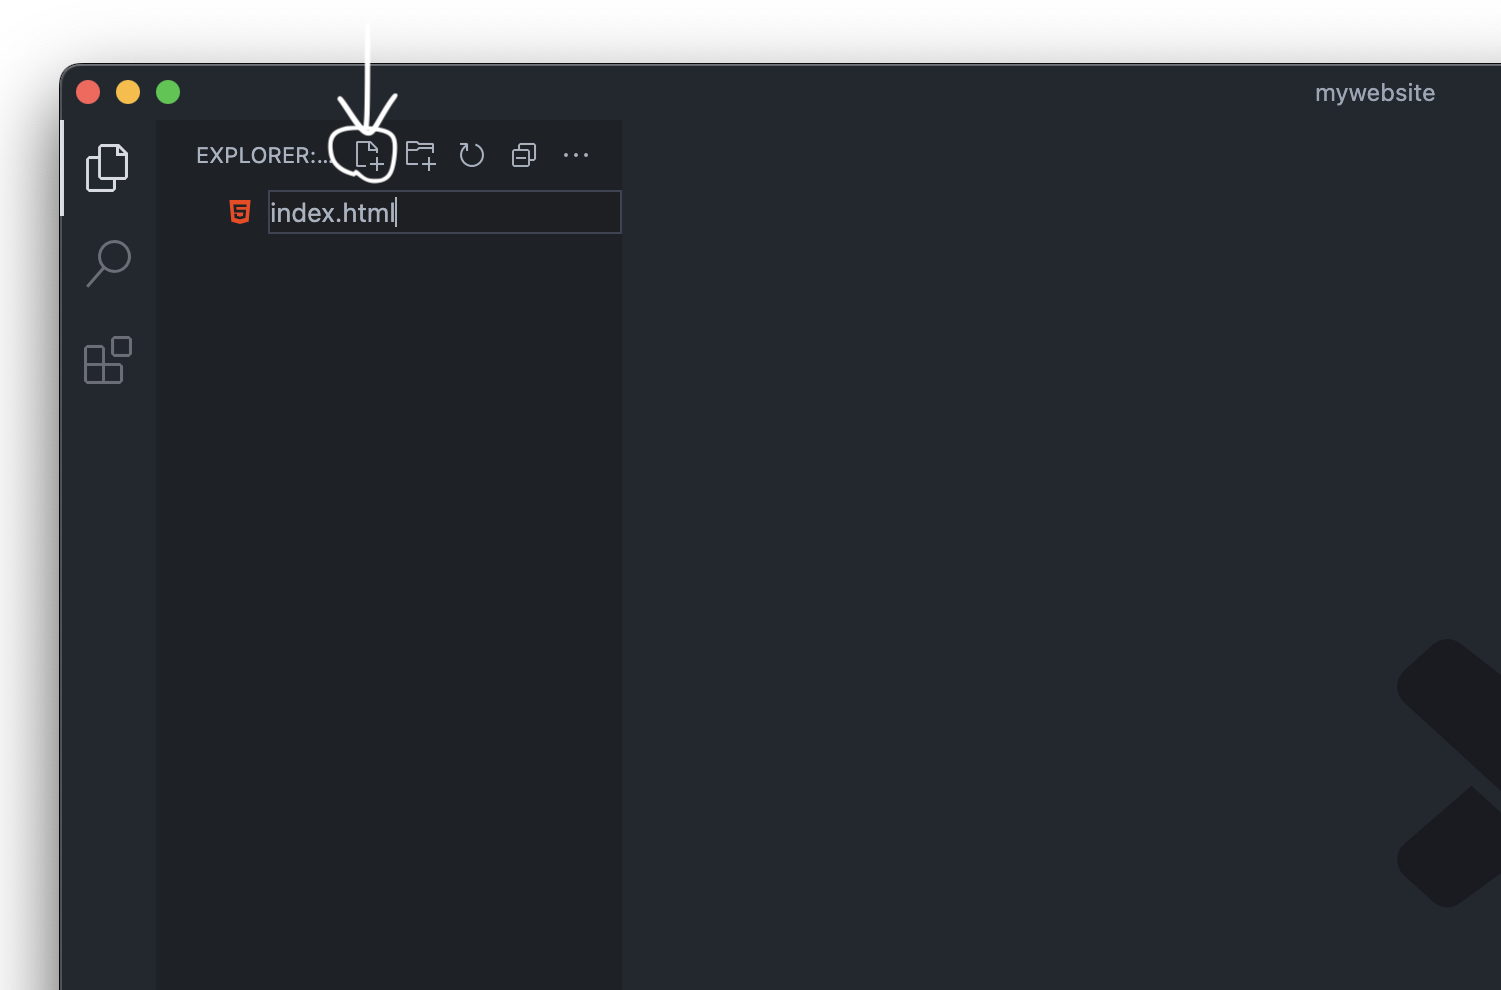
Ok, lets start creating the website. Firstly go File > Open Folder and
create a new folder and name it anything you like. This is the folder
that will contain all the files for the website.
Back in VS Code there will be a sidebar on the left, right click and
create a file, name it index.html (putting .html is important). This is
the file that will contain the website.
Creating a new file
Step 4: Start Programming
Click on index.html in the sidebar, the middle panel should change to
show an empty document. This is where you will write all the code for
the website, it's also what shows when you press 'Inspect Element' in a
web browser.
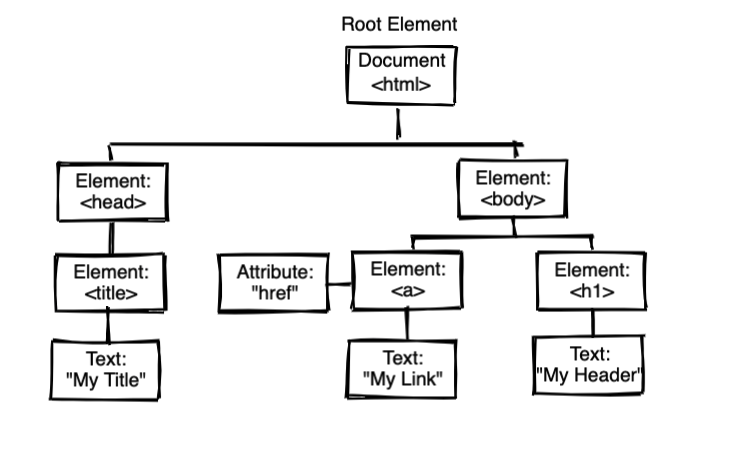
We will make a website that has a title and a bit of text, just to get
you started. One thing you will need to know is that HTML has nodes or 'containers' to it and it looks
intimidating but it
actually makes programming with it a lot cleaner and easier.
Think of it like there's a big box, in that box there are smaller containers and in those smaller containers there
can be food or even smaller containers with food in them. The food is the text/anything else on the page and the
containers are the sections. This sorts out the code more so it doesn't get messy just like in real life where you
can be more organised with sorting food in your pantry.
HTML's Structure
So, lets get started...
Firstly we want to tell the computer loading the website what type of document this is. This document is a HTML
document so that is what we will write at the top. We also want to start creating our nodes or 'containers'. This
code block below will show what you should have on your page at the end of every section.
        <!DOCTYPE html>

        <html>
          <body>

          </body>
        </html>
So far we have said the document is a HTML one and added our nodes. Let's continue.
Next you will want to write <p></p> in your body node. The p stands for paragraph and who
would have
guessed... we write text in this node!
Now, write whatever you want in this, but for this tutorial I will write the text: cool website
(inside the
> < two things whatever they are called).
Ok, we also want a heading as well so do the exact same thing as the paragraph text but replace 'p' with 'h1' and
write a cool title in between, just like the previous text.
Your code should look something like this so far:
        <!DOCTYPE html>

        <html>
          <body>
            <h1>this is a heading</h1>
            <p>cool website</p>
          </body>
        </html>
Next step we will test if our code works on a real website that opens in your web browser.
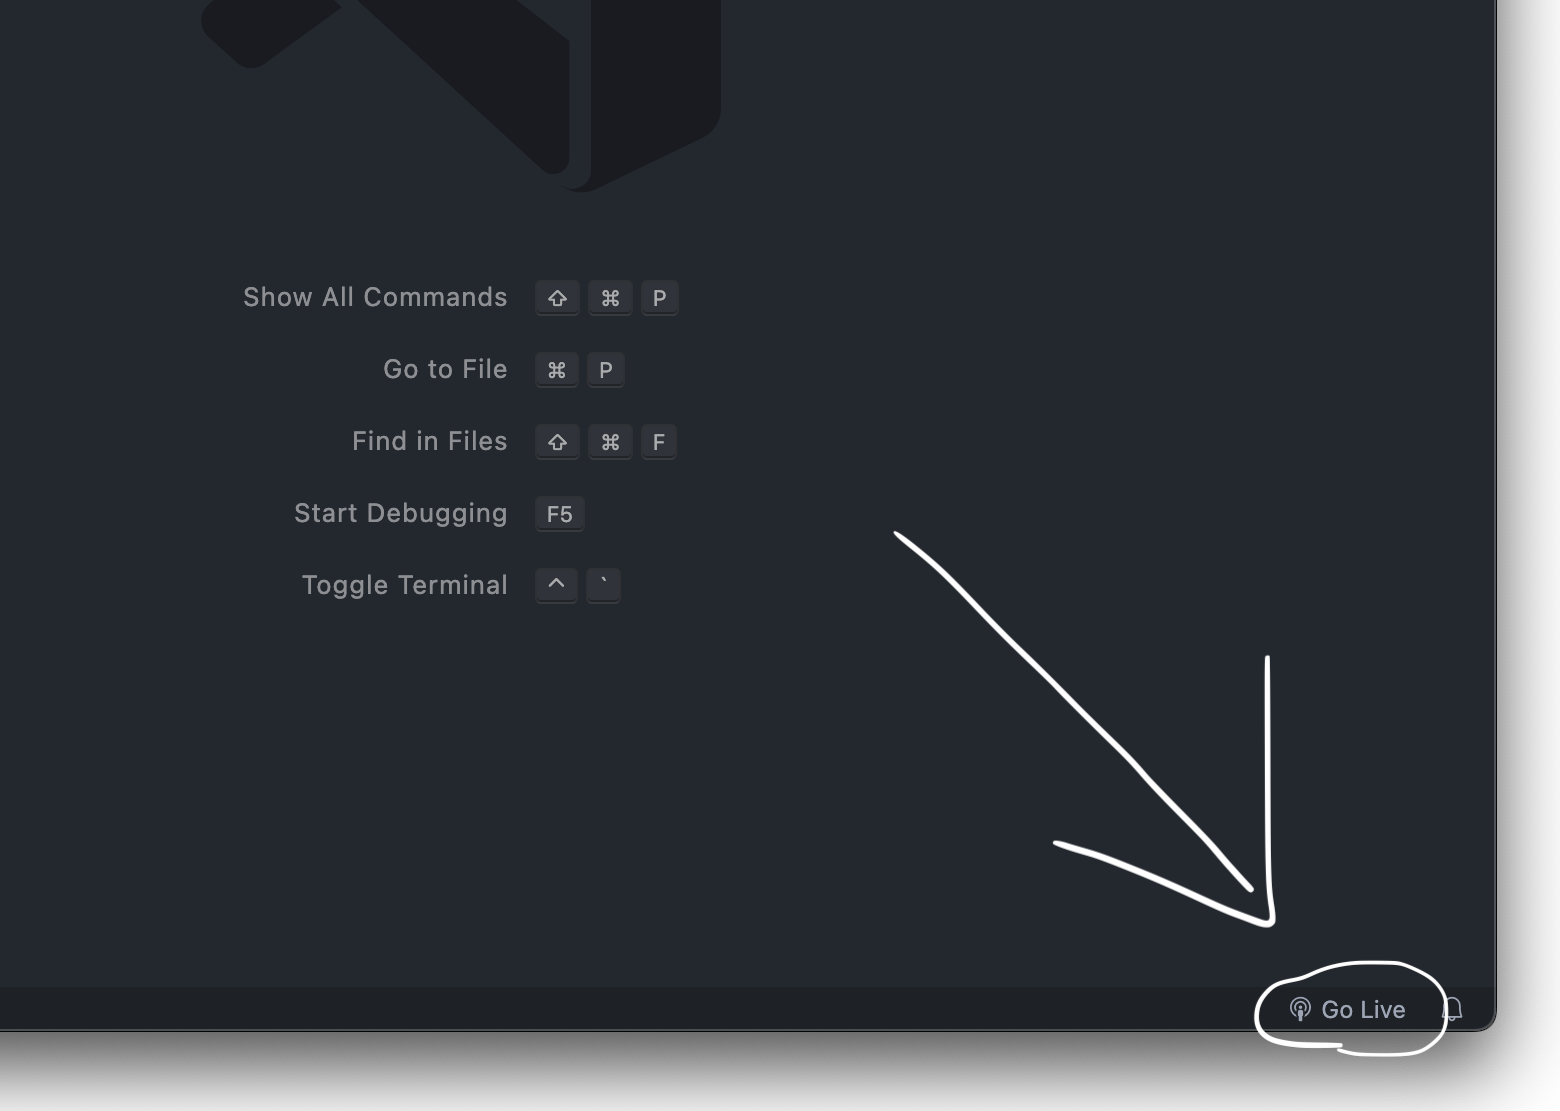
Step 5: View Your Website
Using the very handy live server extension you downloaded earlier, we are going to host the website, only for
yourself on your own computer.
What you want to do is go to your VS Code index.html script and just look at the bottom of the window. There
should be this button in the bottom right the status bar that says 'Go Live'. Click it.
Starting Live Server
It should only take a second or two and then a window should open up in your default browser. This tab will have
your very own made 100% by you website on it.
Congratulations on making your first website, now you can go and learn more HTML and even CSS to improve on your
already built foundations for the website.
In the future you could even publicly host this website using a free
tool online, but that's past what this
tutorial is going to give you.
A note from the creator
This website may be very small and may have not given a lot of knowledge, but I hope you learnt a little.